
Recording Configuration
Recording formats
Click on the icon  attached to the button
 at the top of the interface to open the recording settings menu.
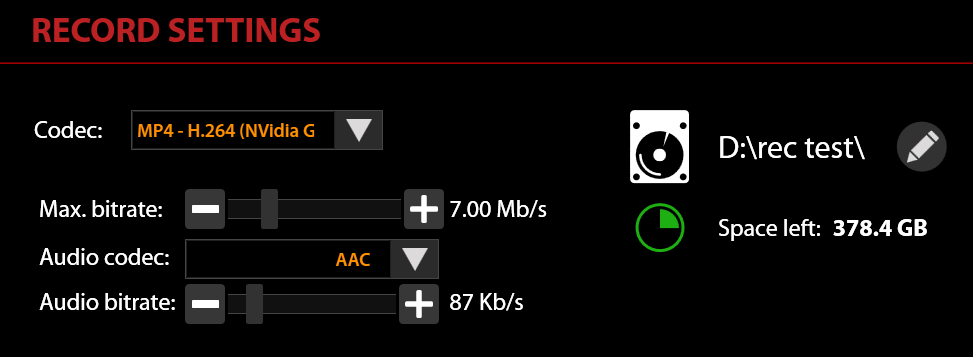
You can choose your recording format depending on the video system:
Apple Pro Res
This codec offers a good quality image and needs few resources for the compression/decompression. The files are larger. Apple Pro Res exists in 2 versions:
- Proxy: 30% more lightweight than Pro Res 422, the target bitrate is around 100Mbps in Full HD.
- LT: More compressed, its bitrate is around 45Mbps.
Compatibility: Apple Final Cut Pro, QuickTime.
MP4 H.264
The codec offers a very good size to quality ratio. It requires considerable resources for the compression/decompression. This is why MULTICAM proposes different versions:
- H.264 (CPU): The compression is carried out via the CPU
- H.264 (Nvidia GPU): the compression is carried out via the graphics card which frees up the CPU for the other software operations.
You can personalize the target bitrate of the recorded video. If, for example, you would like to quickly broadcast the video (directly by streaming or through a copy on a USB drive), a low bitrate of around 2Mbps would be sufficient. If you would like to save a good quality Master archive. A bitrate of 20Mbps is recommended.
You also have a choice concerning the audio codec for the audio track.
The machine can support 1 recording H.264 GPU + 1 live streaming H.264 GPU + 1 live streaming H.264 CPU
Compatibility: Apple Final Cut Pro X, Adobe Premiere Pro, QuickTime, Windows Media, VLC.
MPEG-II
This codec is relatively old but very widely used with an interesting quality/size/performance ratio. It requires less resources than MP4 in exchange for a larger size. Give priority to this format for recordings when it comes to post-production.
Compatibility: Apple Final Cut Pro X, Adobe Premiere Pro, QuickTime, Windows Media, VLC.
Destination file and folder
The recording settings interface allows you to specify the disk and the recording folder, all while indicating remaining free space.
Click on  to open the File Browser and modify the destination (by choosing, for example, a network drive or USB).
The file name is automatic, following the classification:
AAAA-MM-DD_hhmmss/Source/
AAAA-MM-DD_hhmmss.XXX
An option is available that allows you to split files automatically by X minute increments. In the event of a power failure, you can be assured that you have not lost the entirety of your recording. This option is controlled via the Settings.